Multitech tutorial
Watteco's devices are compatible with the gateway MultiConnect Conduit AEP Model.

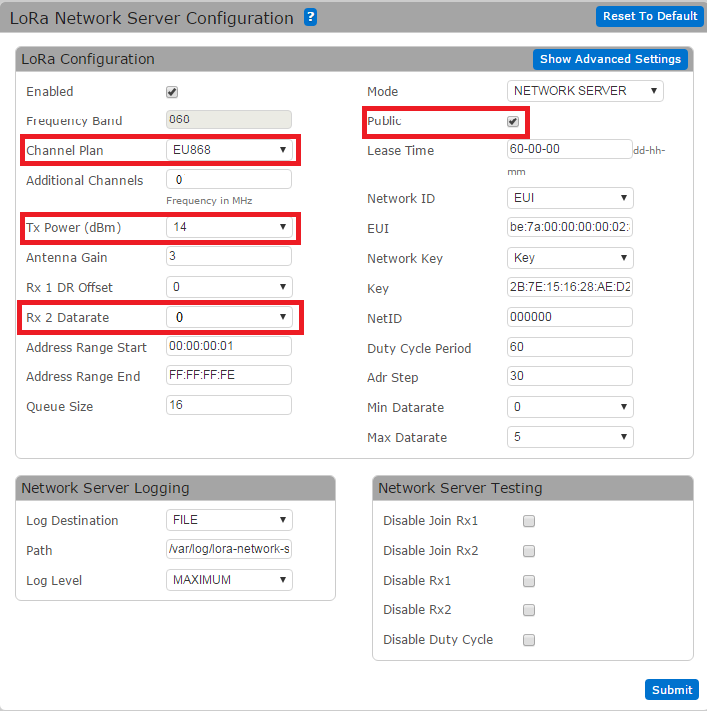
To start off, it is necessary to change the configuration of the LoRa Network Server as follows:
v.1.4.1
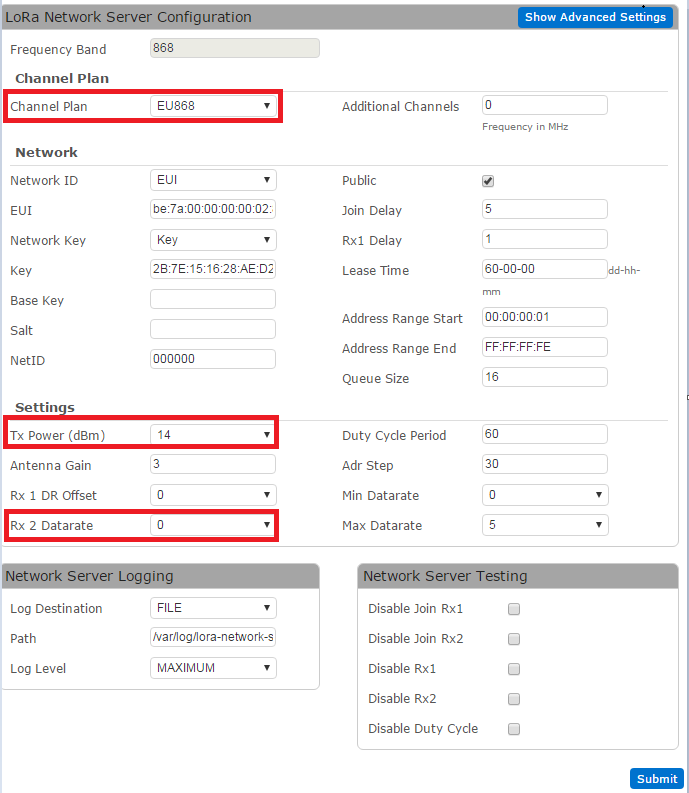
• The "Public" box has to be checked.
•The frequency should be changed depending on geographic region.
•The Tx power has to be maintained at 14 dBm.
•The configuration of RX2 window should be in SF12 which corresponds to DR0.
Once the configuration is done, add the device to the network by sending the following command via SSH:
• For ABP or manual network joining:
lora-query -a devAddr Class AppEUI DevEUI NwkSKey AppSKey
For example:
lora-query -a 000001bf A 0001020304050607 70B3D5E75E0001BF 2B7E151628AED2A6ABF7158809CF4F3C 2B7E151628AED2A6ABF7158809CF4F3C
• For OTA join with unique APPKEY:
lora-query -a devAddr Class AppEUI DevEUI AppKey
For example:
lora-query -a 000001bf A 0001020304050607 70B3D5E75E0001BF 2B7E151628AED2A6ABF7158809CF4F3C
To remove a device, send the following command:
lora-query --node-delete devAddr
v.1.6.4/v.1.7.0
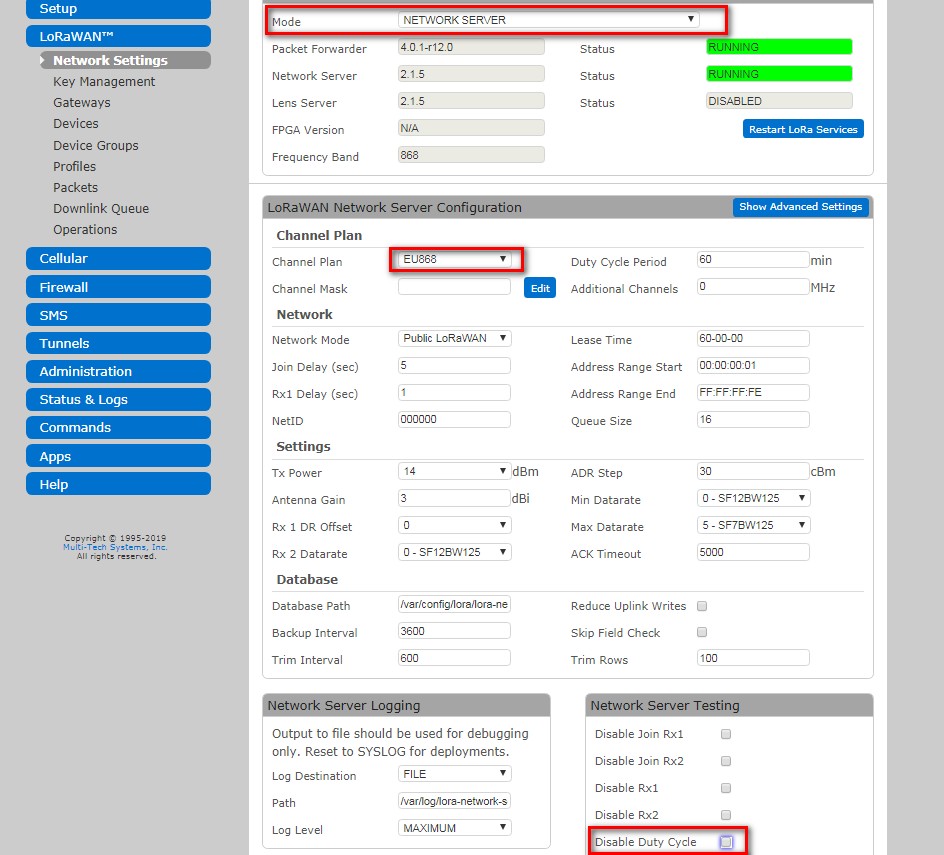
You can check Disable Duty Cycle to test with a high frequency frames.
Once the configuration is done, add the device to the network by clicking on "Add New" and filling fields as follow:
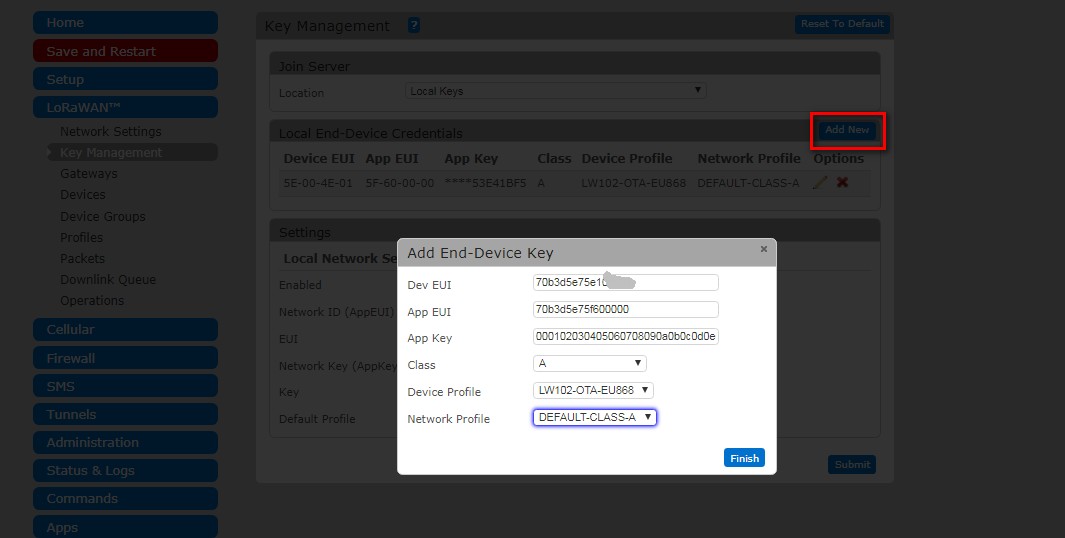
DevEUI, AppEUI, AppKey are on the .txt files.
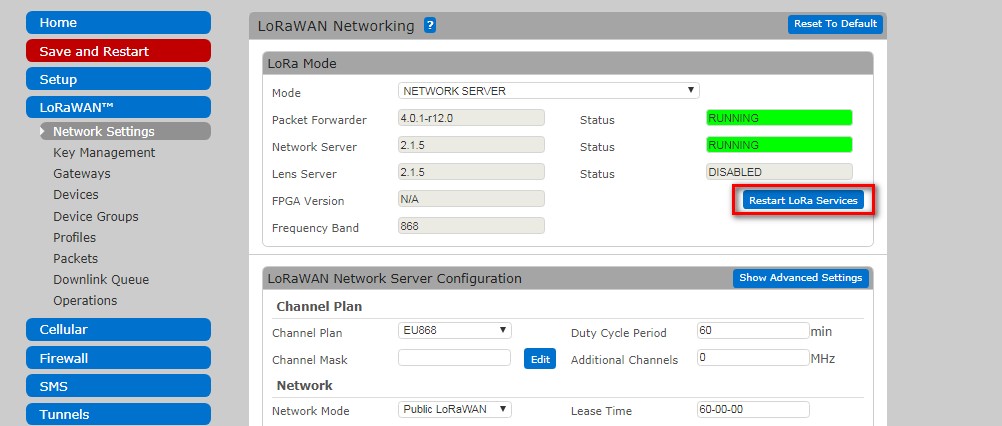
Then you need to restart the LoRa Services:
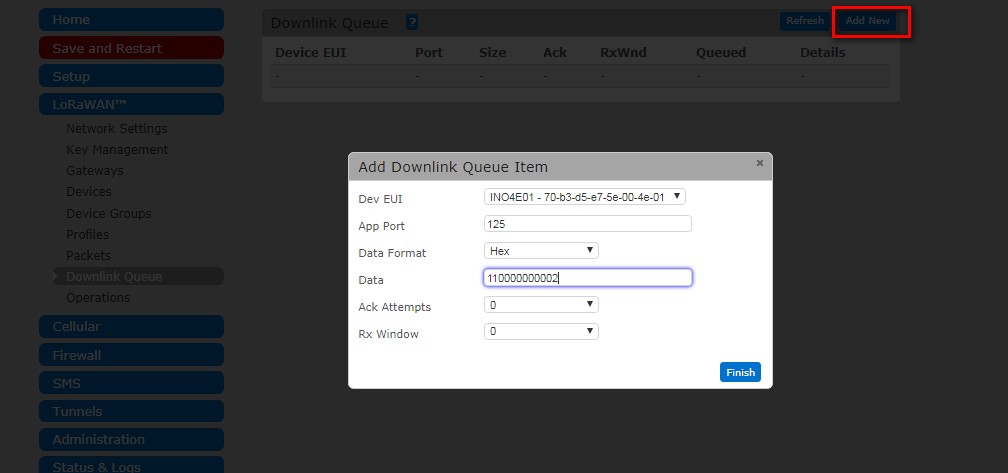
It is possible to send downlink frame to remote device by clicking on "Add New" in Downlink Queue:
On these releases, it is possible to have some trouble with extra lorawan command frames. It is due to an asking from lorawan server to add new channel in spreading factors which are out of scope of sensors and the settings... You can download a new firmware which fixes this bug by doing in ssh on the gateway:
wget https://support.watteco.com/wp-content/uploads/2019/03/lora-network-server.zip
unzip lora-network-server.zip
/etc/init.d/lora-network-server stop
cp lora-network-server /opt/lora/
chmod +x /opt/lora/lora-network-server
/etc/init.d/lora-network-server start
Tips
It is possible to access to log frames directly:
https://192.168.2.1/api/lora/packets
https://192.168.2.1/api/lora/packets/up
https://192.168.2.1/api/lora/packets/down
https://192.168.2.1/api/lora/packets/join
https://192.168.2.1/api/lora/packets/recent
OR
lora-query -x packets list json
lora-query -x packets up json
lora-query -x packets down json
lora-query -x packets join json
lora-query -x packets recent json
Node-RED
Node-RED is a tool for wiring together hardware devices, APIs and online services.
It provides a browser-based flow editor that makes it easy to wire together flows using the wide range nodes in the palette.
To access the app:
• Click on Node-RED under Apps on the left sidebar of the AEP interface.
• Log into Node-RED with the password.
Transmit Packets from the Conduit
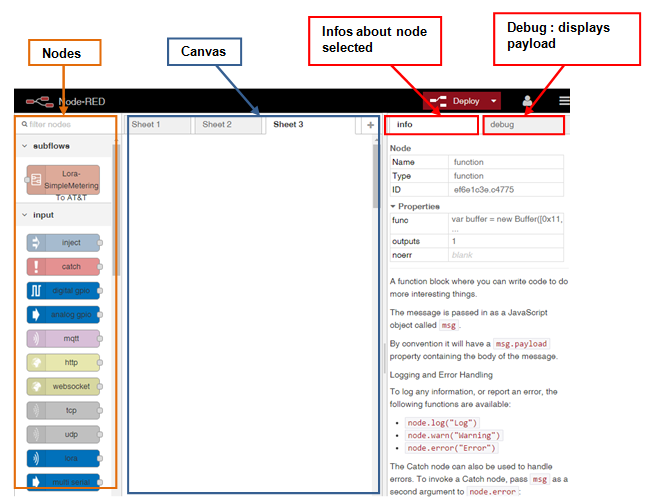
• Drag the lora output, the function, the inject and the debug nodes to the canvas.
• Connect the nodes with a wire as follows:
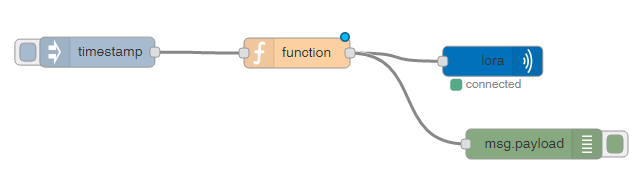
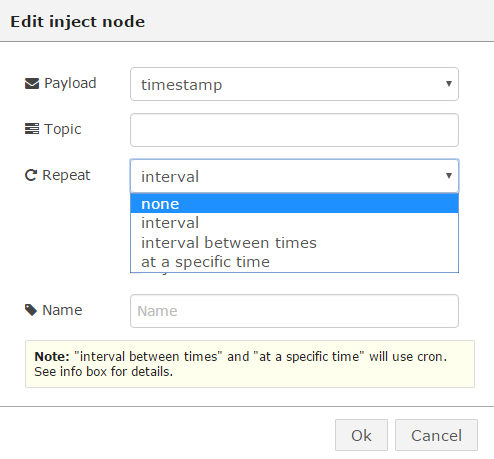
→ Inject node: Pressing the button on the left side of the node allows a message on a topic to be injected into the flow. We can set specific times or an interval to inject the function.
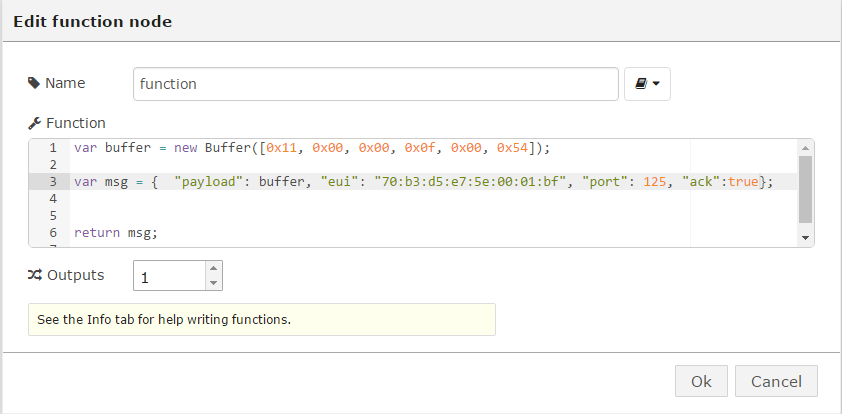
→ Function node: you can write code in this block to send a payload to the device.
→ LoRa output node: packets are sent to this node in one of the two receive windows that open after receiving a packet.
→ The debug node is used to display the output of any message property in the debug tab of the sidebar.
• Click the red Deploy button at the top right of the page.
The flow created above is represented by the following json. It can be imported straight into the editor by pasting the json into the Import dialog.
[{"id":"ef6e1c3e.c4775","type":"function","name":"function","func":"var buffer = new Buffer([0x11, 0x00, 0x00, 0x0f, 0x00, 0x54]);\n\nvar msg = { \"payload\": buffer, \"eui\": \"70:b3:d5:e7:5e:00:01:bf\", \"port\": 125, \"ack\": true};\n\n\nreturn msg;\n","outputs":1,"noerr":0,"x":524,"y":283,"z":"6434e0f2.34c2e","wires":[["cce544b2.2055a8","6aad30c6.a1473"]]}]
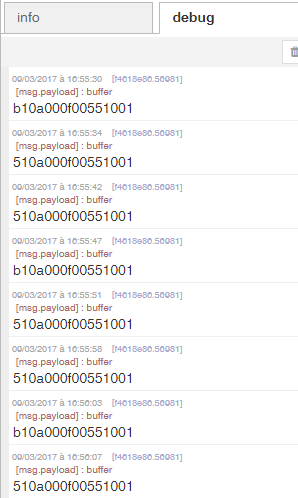
Receive Packets on the Conduit
• Drag the lora input and the debug nodes to the canvas. The data type of the lora input node must be "BYTES".
• Connect the nodes with a wire.

• Click the red Deploy button at the top right of the page.
• Click on the Debug tab at the right side of the page to view received lora packets.